
This guide explains how to install a private content app in Claude, approve access, and start querying your licensed content library.
What You Need Before You Start
Before proceeding, make sure you have:
- A paid Claude account
- An API key provided to you for this content app
You do not need a separate account with the content provider.
Once the app is configured with the API key, no additional authentication is required.
Step 1: Install the Content App in Claude
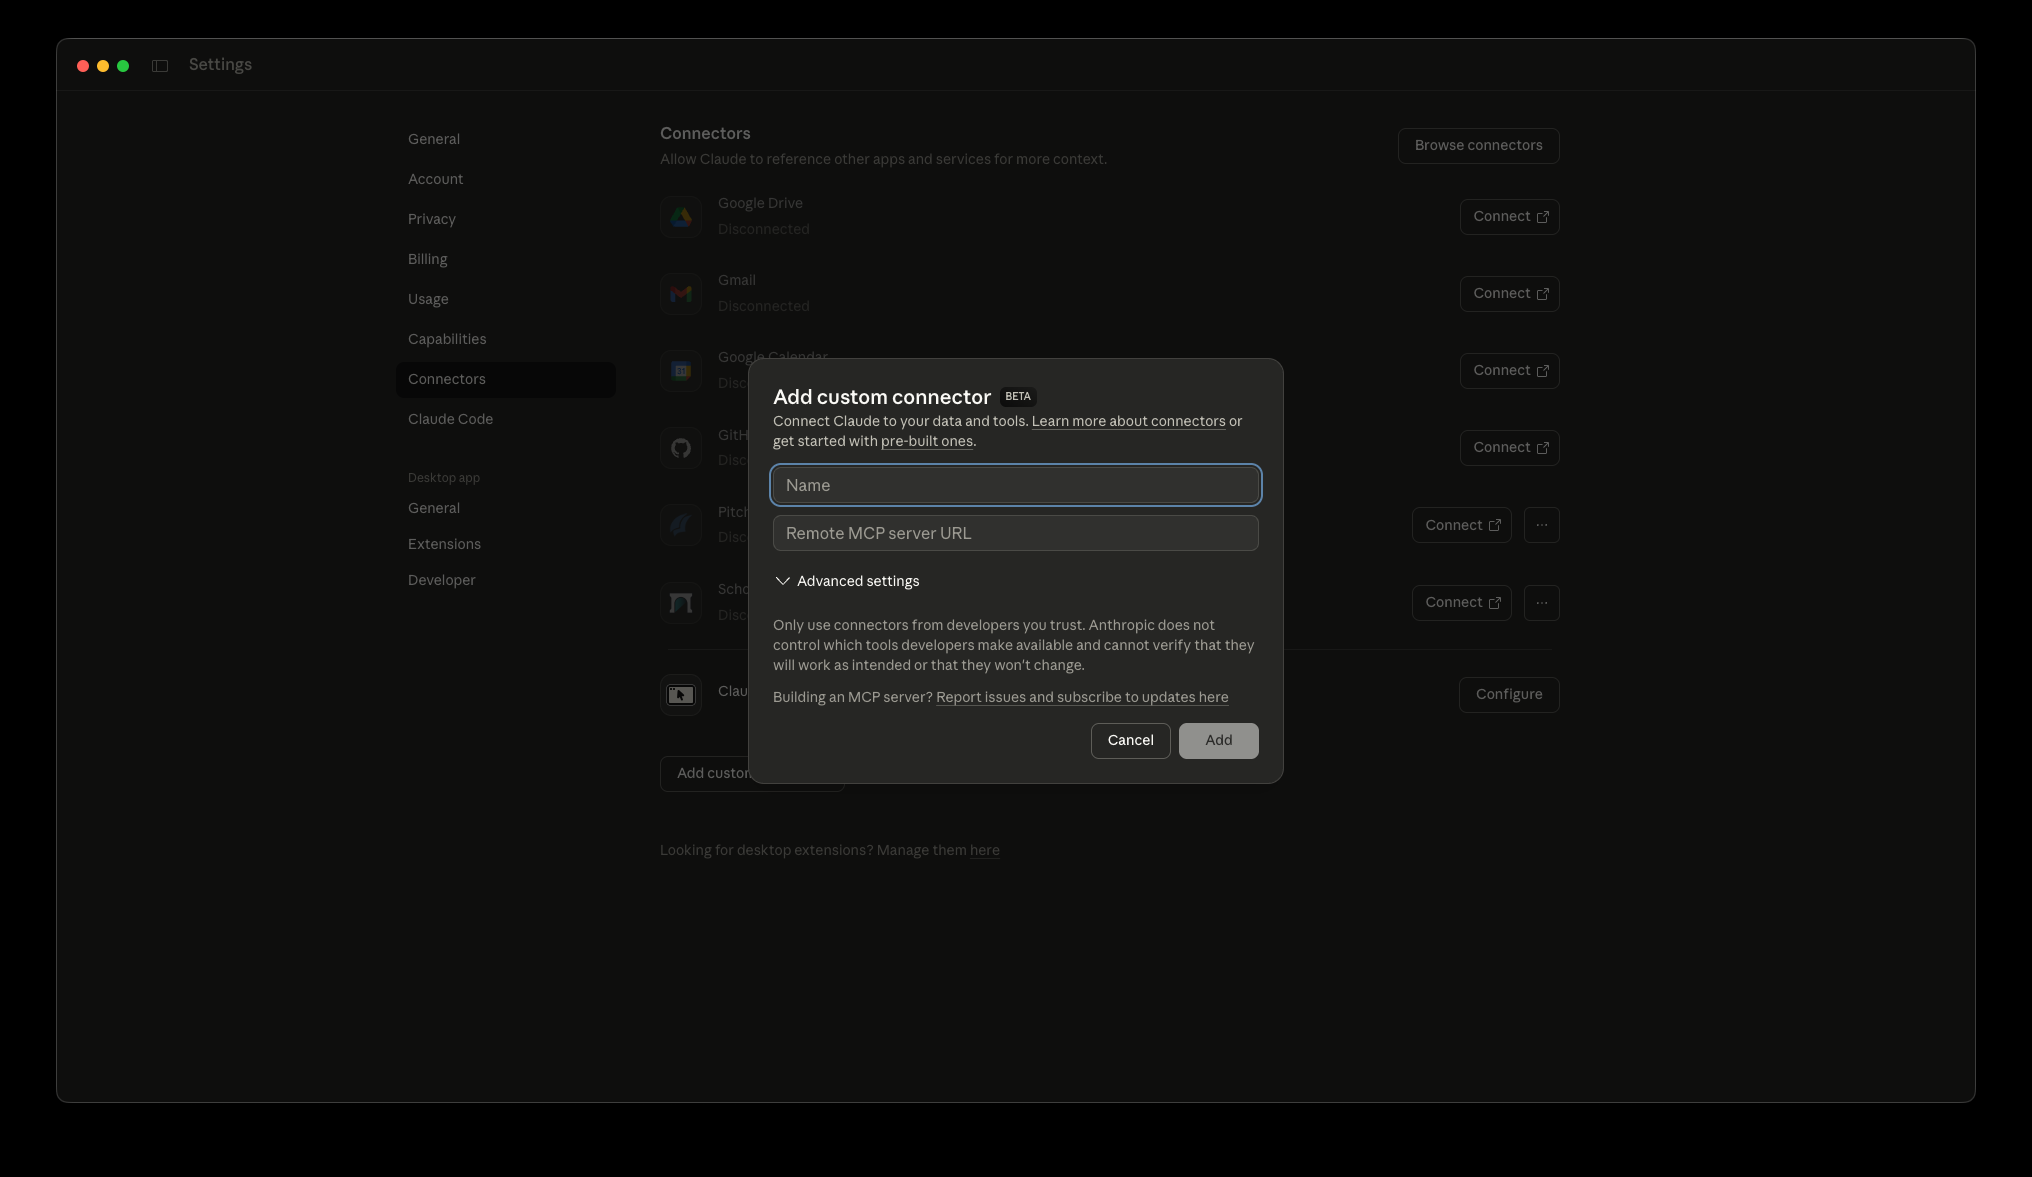
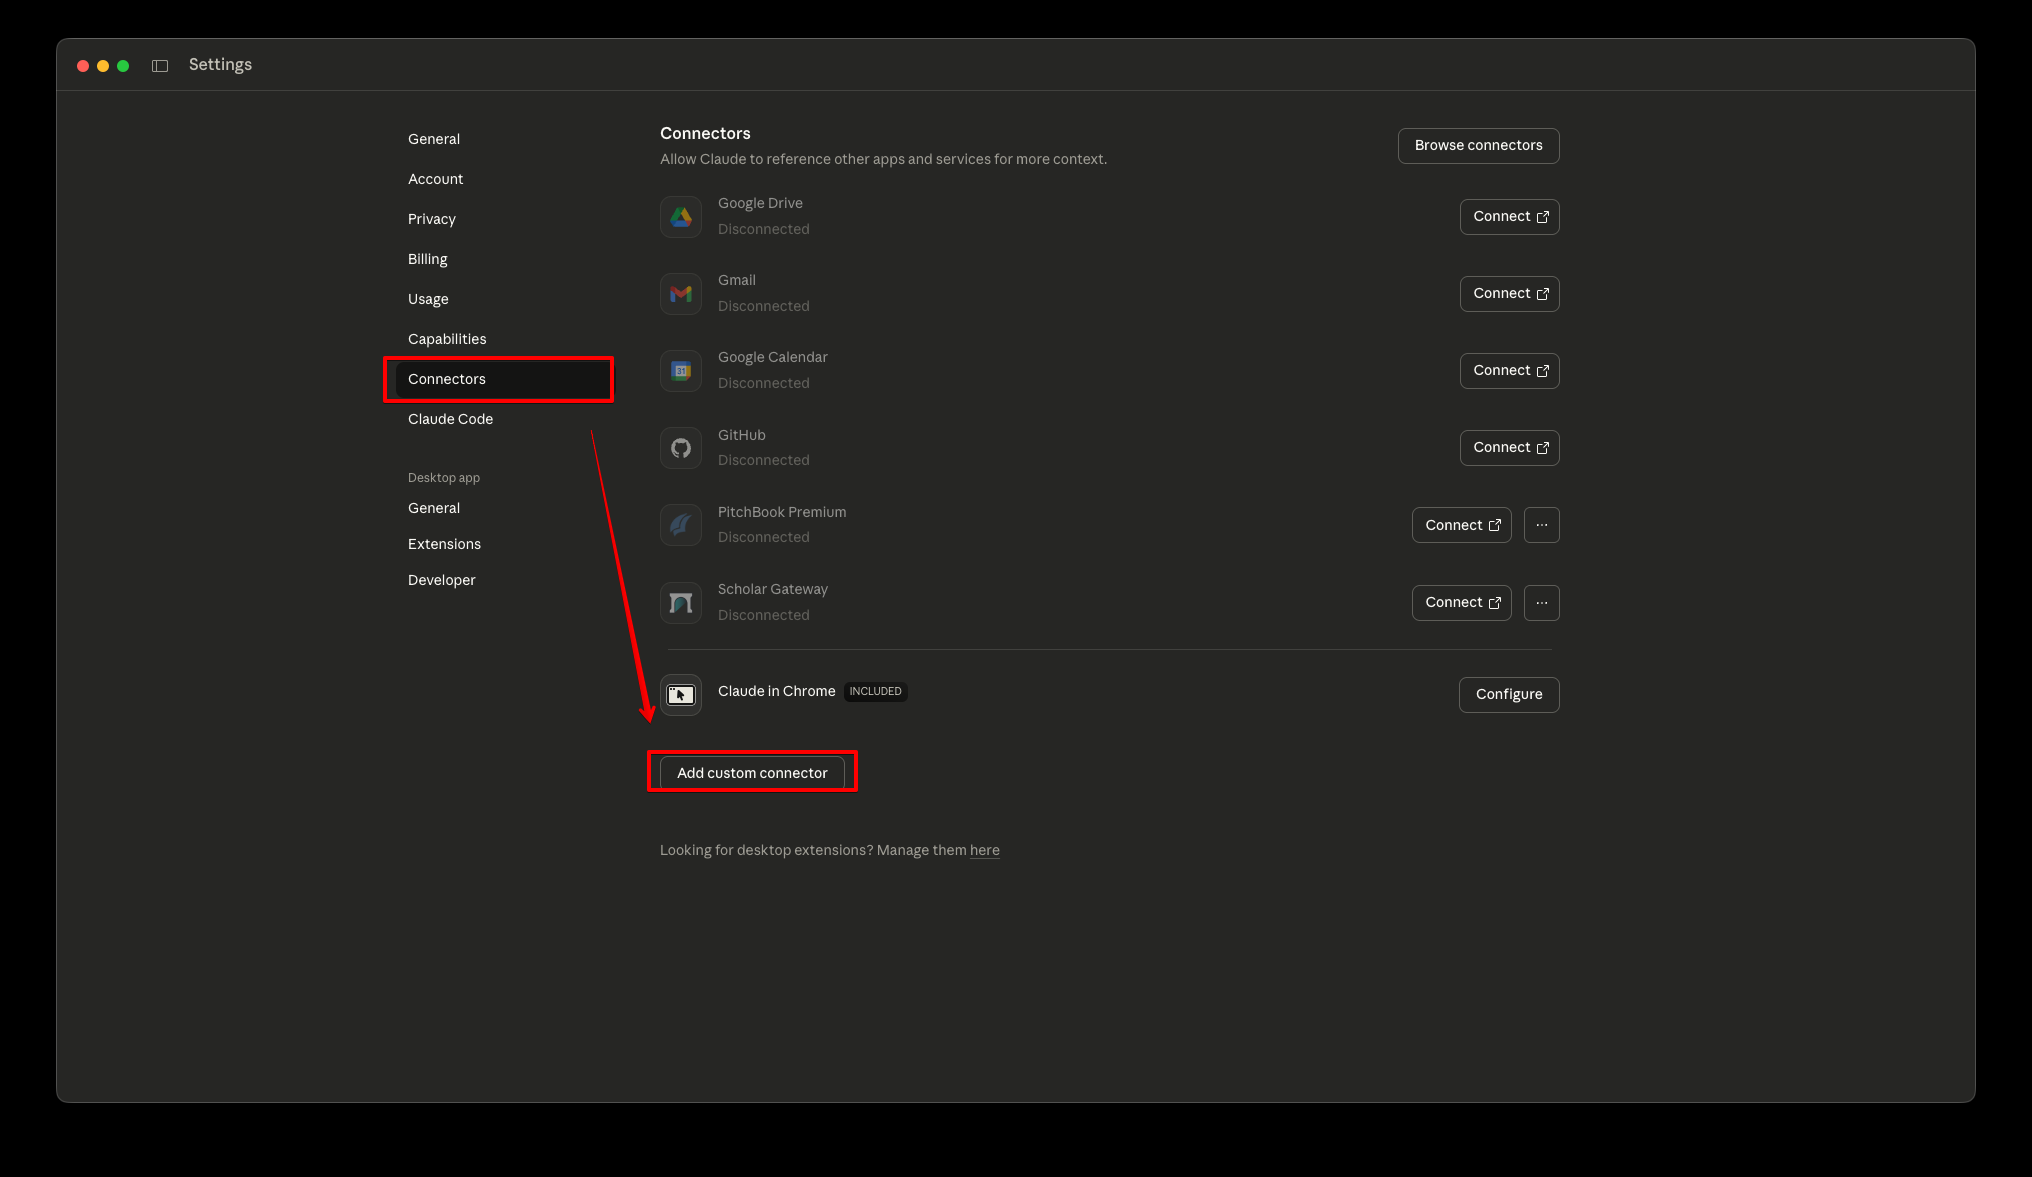
- Open Claude and go to Settings
- Navigate to Connectors (or MCP Apps)
- Click "Add custom connector" at the bottom
- For Name, enter whatever you want to call the application in your Claude instance (i.e. @wiley or @
) - For the Remote MCP server URL, enter this in, replacing
with the API Key you received for your application:
mcp: https://mcp.cashmere.io?api_key=<API_KEY>
- Click "Add"
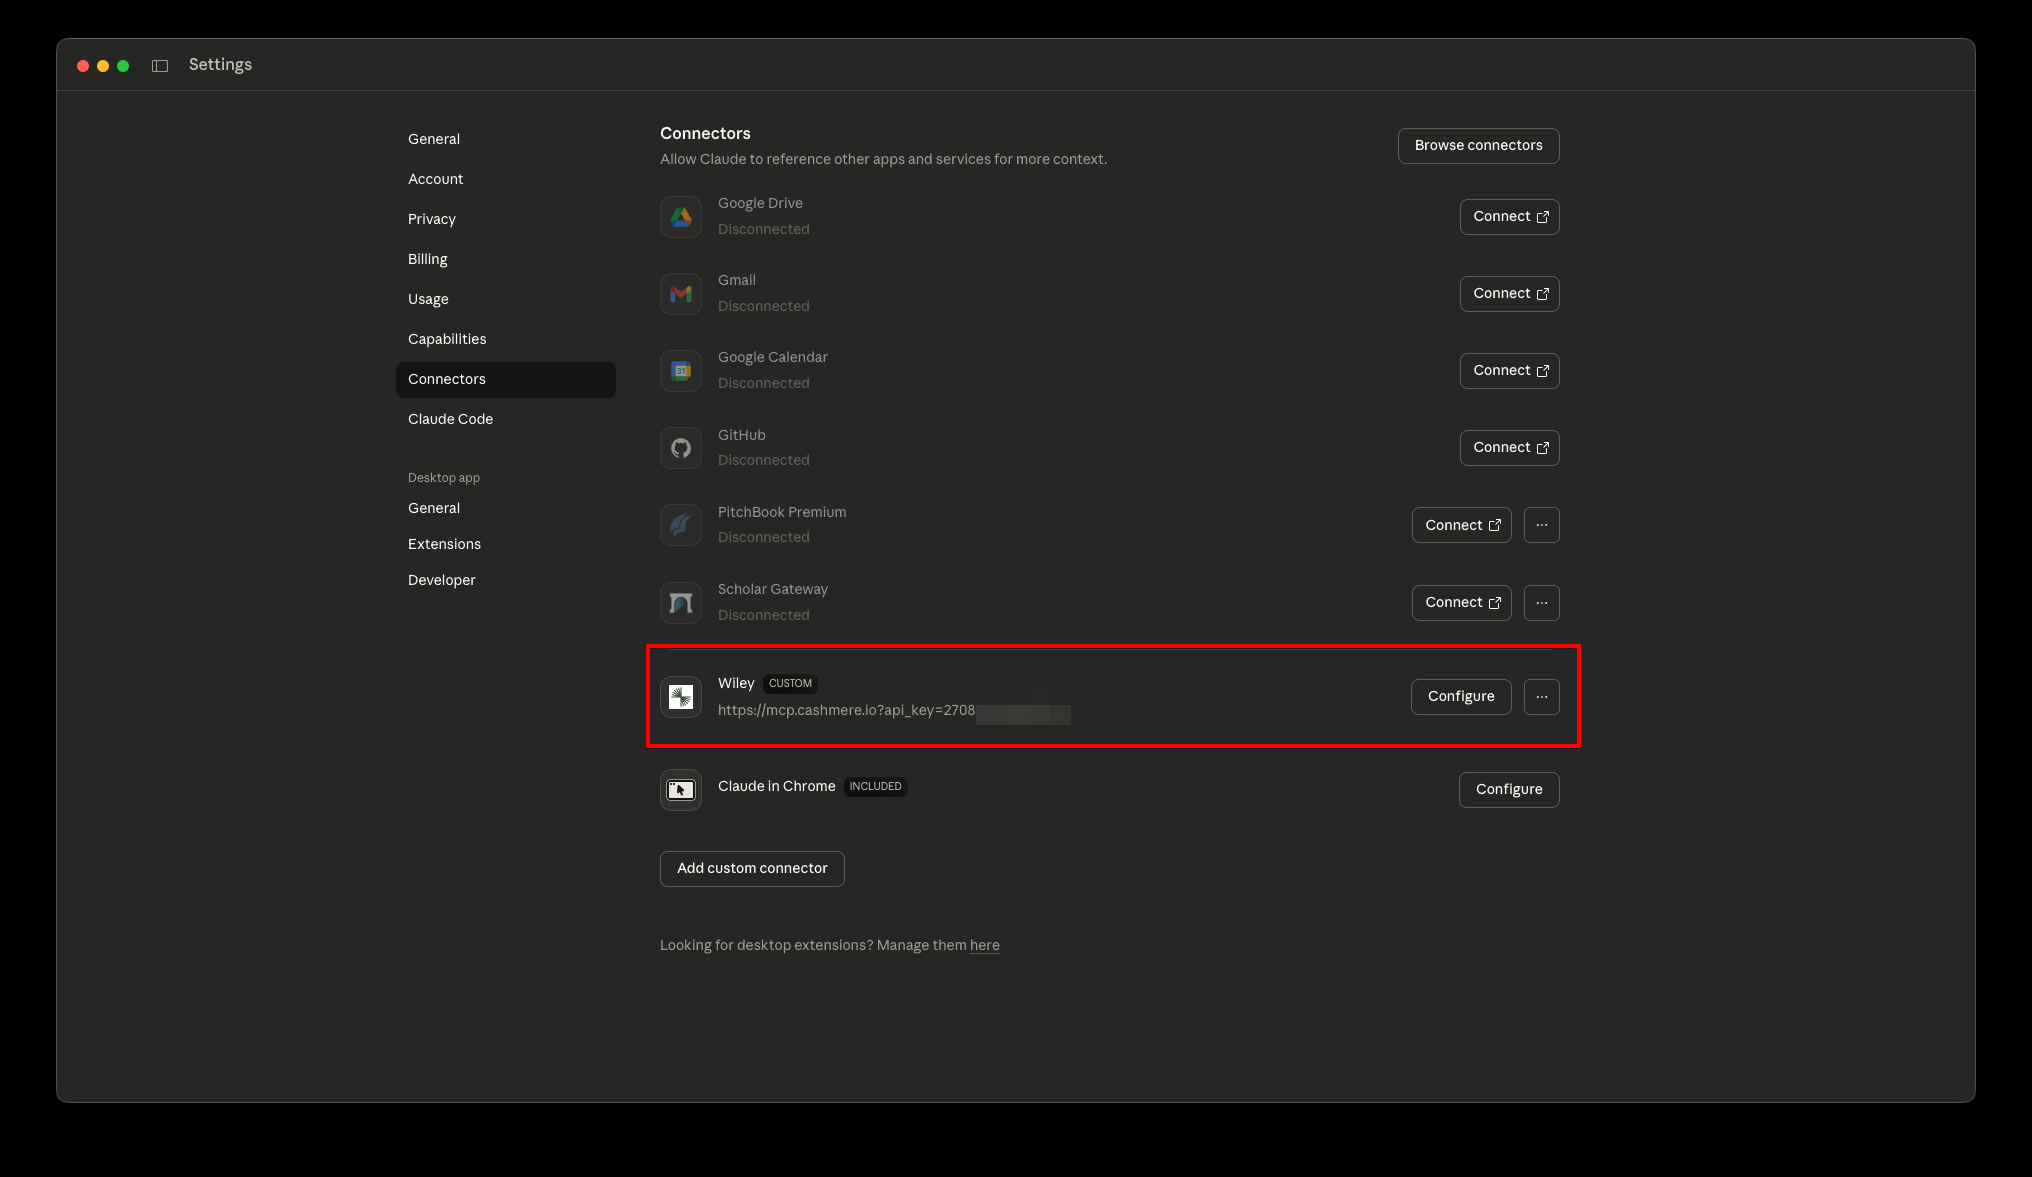
Once installed, the app will appear in your list of available connectors.
Step 2: Approve Tool Permissions (Optional)
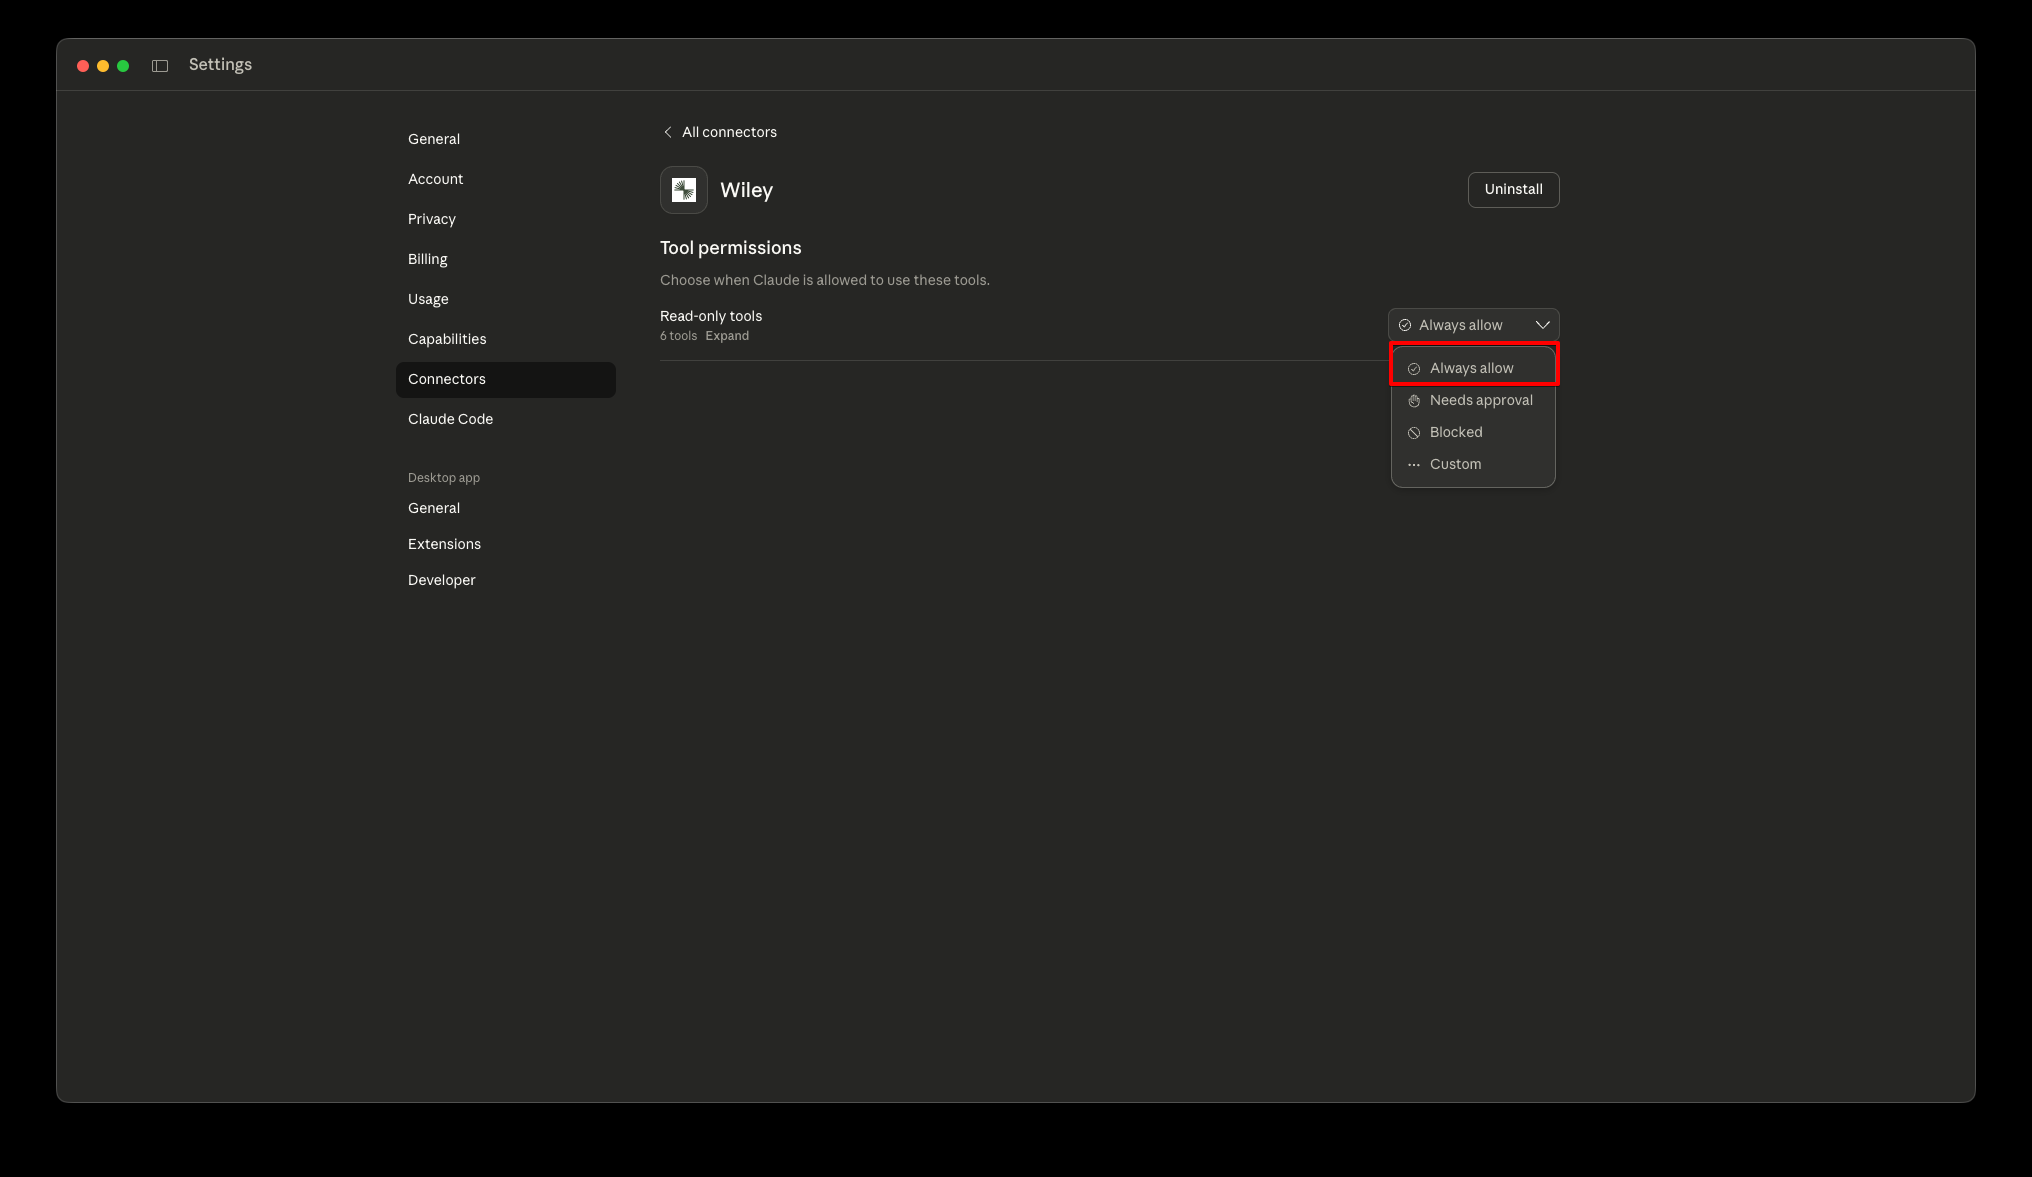
If you don't want to approve MCP tool usage every time, follow these instructions.
- Next to the newly created app on the "Connectors" page, there's a "Configure" button
- Next to "Read-only tools", in the dropdown select "Always allow"
This prevents Claude from interrupting your workflow with permission prompts.
Step 3: Understand the Core Tools
The majority of interactions will rely on two primary tools:
-
list_publications
Returns a list of all available titles in your content library
-
search_publications
Searches across all titles at once
Claude may also use supporting tools to retrieve individual publications or collections as needed.
Tips for Best Results
- Start with list_publications to see what's available
- Use search_publications for broad research questions
- Name specific titles when you want tighter, source-constrained answers